Progressive Enhancement in a Finance App
20 min read
- Live site
- Personal Finance App
- Code repository
- markuslewin/personal-finance-app
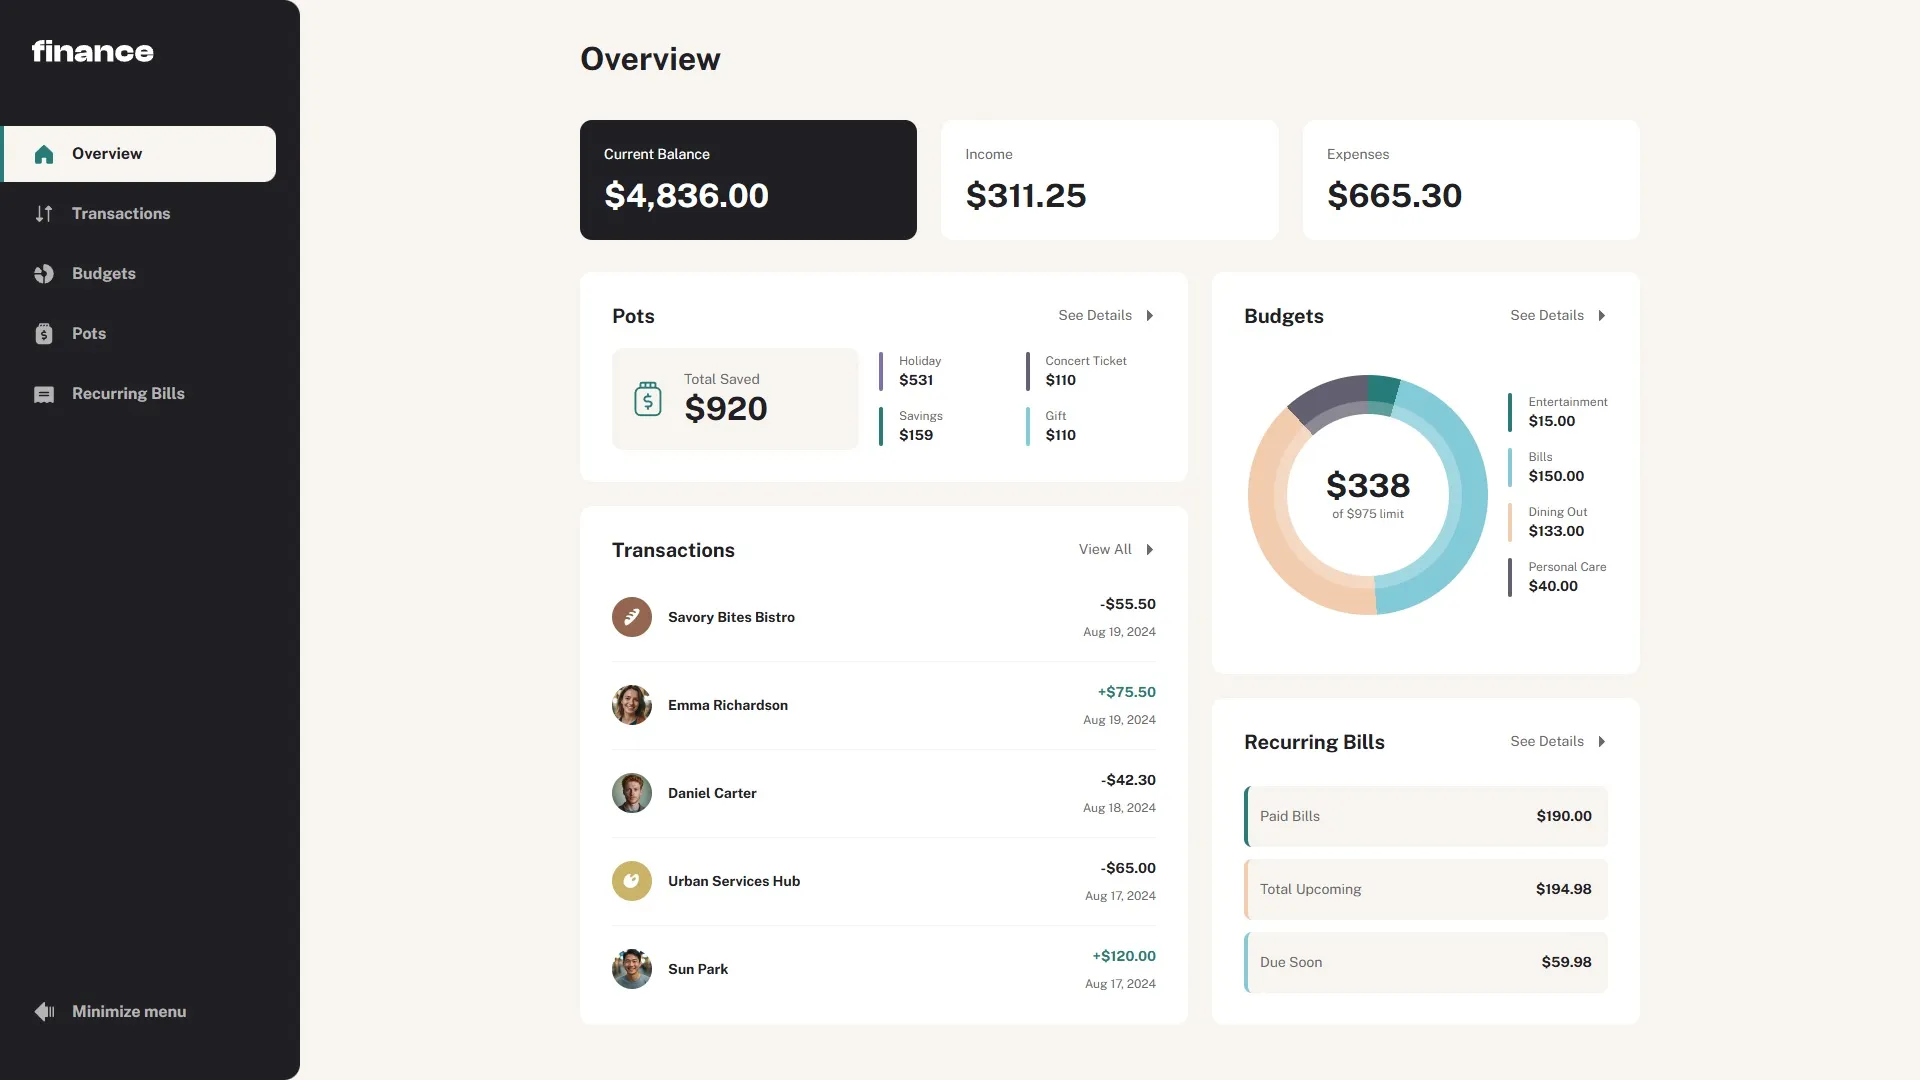
I built this finance app:
The app is a user interface for a payment system. Users can see transactions related to their account. They can also create budgets to track expenses. They can add money to pots to track progress toward their goals.
The app responds to user preferences. It implements a responsive design and respects the user’s font size settings. It also supports high-contrast mode.
The app works without JavaScript.
Next.js brings React to the server. Without a server, a React app only runs in the user’s browser using JavaScript. Consequently, the user must wait for the JavaScript to arrive before using the app. There are many reasons why the JavaScript might not arrive at all. The user may have disabled JavaScript. Poor network conditions can result in failures to load the JavaScript app.
Next.js runs the React app on the server to create the initial HTML of the page. This unlocks patterns of “progressive enhancement”. We can build the app to provide a baseline experience with only HTML. We do not require JavaScript. If the JavaScript arrives for the user, we use it to enhance the user experience.
With this project, I wanted to try out progressive enhancement in a modern framework. I wanted the workflow to resemble a real-world project. Thus, I decided to use a challenge from Frontend Mentor. Frontend Mentor is a site that lists frontend challenges. Each challenge consists of a design file and a list of requirements for the app to abide by. My job is to turn the specification into a living web app.
Progressive enhancement is not suitable for all types of projects. Some app features are not possible to replicate using only HTML. I picked a challenge that seemed like a good target.
Progressive Enhancement
Progressive enhancement is a strategy for building resilient websites. Each user gets the experience best suited for their session. We start with HTML. If the browser manages to load JavaScript, the app can enhance the experience for its user. This strategy is not tied to the availability of JavaScript only. For example, we can use the CSS @supports at-rule to enhance the page layout for capable browsers.
In this project, I am trying out a JavaScript framework. Thus, I am focusing on the JavaScript aspect of the strategy.
In HTML, many user interactions lead to server requests for a new HTML document. When the new document comes in, it replaces the current document. Many enhancements aim to optimize these server round trips.
The JavaScript can—for example—start fetching data for the next page as soon as the user hovers over a link. It can give quick feedback on form interactions that usually need a server request.
Say we are building a social media site on which users can post short messages. The site does not allow messages that are over 280 characters long. HTML defines a textarea element for users to type messages into. HTML even defines a maxlength attribute that limits the value inside the textarea:
<textarea id="message" name="message" maxlength="280"></textarea>
<p id="counter-container" hidden>
	Characters left: <span id="counter">280</span>
</p>
This is a great baseline experience. With JavaScript, we can update a counter below the message. This enhances the experience by giving the user live feedback about their message.
const $message = document.getElementById('message')
const $counterContainer = document.getElementById('counter-container')
const $counter = document.getElementById('counter')

$counterContainer.removeAttribute('hidden')

$message.addEventListener('input', (event) => {
	$counter.textContent = 280 - event.target.value.length
})
This is a progressive enhancement. We layered it on top of an already working feature. We enhanced an existing textarea. We did not add the textarea using JavaScript, for example.
Features
I want the app to work with only HTML. This means having a server that generates HTML for user requests. A client-side app can use JavaScript state to decide what to show the user. Web servers generate HTML from URLs.
While I have to structure my app around URLs, this is a great approach for any web app in general. URLs are a core feature of the web. They enable bookmarking and sharing.
Navigations
HTML uses anchor elements to navigate a user through an app. Consequently, every page needs to be reachable by URL. When a user presses a link, the browser fetches the corresponding HTML document.
Next.js provides primitives that enhance the user experience of these navigations. The Link component enhances the anchor elements. It turns the navigations into client-side navigations. When a user presses a link, the app no longer replaces the whole HTML document. Instead, the app fetches data for the next page. When the data arrives, the app replaces only parts of the page.
We can see this in action by tabbing to a link in the sidebar. When pressing Enter, the new page becomes visible. In the baseline HTML experience, the navigation still works. However, the browser loses focus on the link when it throws away the old document. In the enhanced experience, the user does not lose focus on the link. The app only replaces part of the page.
The Link component also “prefetches” content for the page to which it links. If the content has already loaded when the user clicks the link, the navigation is instant. This is not relevant to this project, though. Next.js only prefetches static pages, but all pages in this project are dynamic.
There is one problem with this enhancement. When the user presses a link on a slow network, nothing seems to happen. There is no feedback while the data is being fetched. In the baseline experience, the browser tells the user that the next page is loading. After we opted in for client-side navigations, this is our responsibility.
Next.js recommends adding a loading.tsx file that it will use to show a pending state for the user. This works great for the enhanced app, but for the baseline app, the page never shows:
This happens because Next.js built this feature using React Suspense boundaries. A Suspense boundary shows a fallback while data is loading. When data becomes available, it swaps the fallback for the real view using JavaScript. This feature requires JavaScript.
We are not stuck. Next.js provides other ways to show pending states. However, this highlights that progressive enhancement in Next.js is not automatic. We need to understand the features we use to make sure we do not break the baseline experience.
I ended up overriding the Link component of Next.js to start my own transition. This allowed me to show a progress bar when the next page was loading:
export const Link = (props: LinkProps) => {
	const router = useRouter()
	const progress = useProgress()

	return (
		<BaseLink
			{...props}
			onClick={(e) => {
				if (isModifiedEvent(e)) {
					return
				}

				e.preventDefault()
				startTransition(() => {
					progress.start()
					router.push(props.href, { scroll: props.scroll })
				})
			}}
		/>
	)
}
This is a pattern I saw in “react-transition-progress”. In the future, I hope Next.js lets me call this Action in an “action prop” of theirs.
Dialogs
The design also makes use of menus and dialogs for updating budgets. Each budget on the budgets page has an action button that opens a menu. Through the menu, the user can choose to edit or delete the budget. If the user presses “Edit”, the app opens a dialog:
This is possible in the enhanced app using ARIA widgets. For the baseline experience, there is no way to implement this flow using only HTML and CSS. The browser should position the menu relative to the button opening it. This is possible with CSS anchor positioning. However, the current browser support for this feature is only about 77%.
Another potential solution would be to implement the menus using checkboxes. We could style the menu to only be visible when the menu button is :checked. This would misrepresent the semantics of the HTML elements, though. A menu button is not a checkbox. There would also be problems with user interactions. These types of menus should be “light dismissible”. They should close when the user presses Escape. Not even checkboxes can save us there.
The design is too complex for the baseline experience. I did not want to change the design, though. Instead, I chose to provide different experiences between the two versions.
When doing this, we need to consider the risk of layout shifts. When a user visits the site, they will always see the baseline version first. When JavaScript becomes available, the browser upgrades the app. If there are visual discrepancies between the two versions, the elements will jump. This can be a jarring user experience and tank SEO scores.
I solved this by creating links that look identical to the menu buttons. In the baseline experience, the “buttons” are links that lead to a details page for the budget. On that page, the user can choose to edit or delete the budget. This way, the elements have the correct semantics and do not cause layout shifts. This page was, of course, not included in the design, so I had to create it myself.
The dialogs in the enhanced experience use a pattern I saw in Nextgram. Next.js calls it a modal pattern. The solution makes use of “Parallel routes” and “Intercepting routes” of Next.js. Parallel routes let us display multiple pages at the same time. Intercepting routes let us override which part of our app to load.
When the user presses “Edit”, Next.js would usually load the page for editing a budget. With an intercepting route, we can instead load our dialog version of that page. Parallel routes display both the dialog and the budgets page at the same time.
These features use client-side JavaScript. This is fine. Users without JavaScript navigate to the details page as they press the menu “button”.
Filtering Search Results
The app shows the transactions on the transactions page:
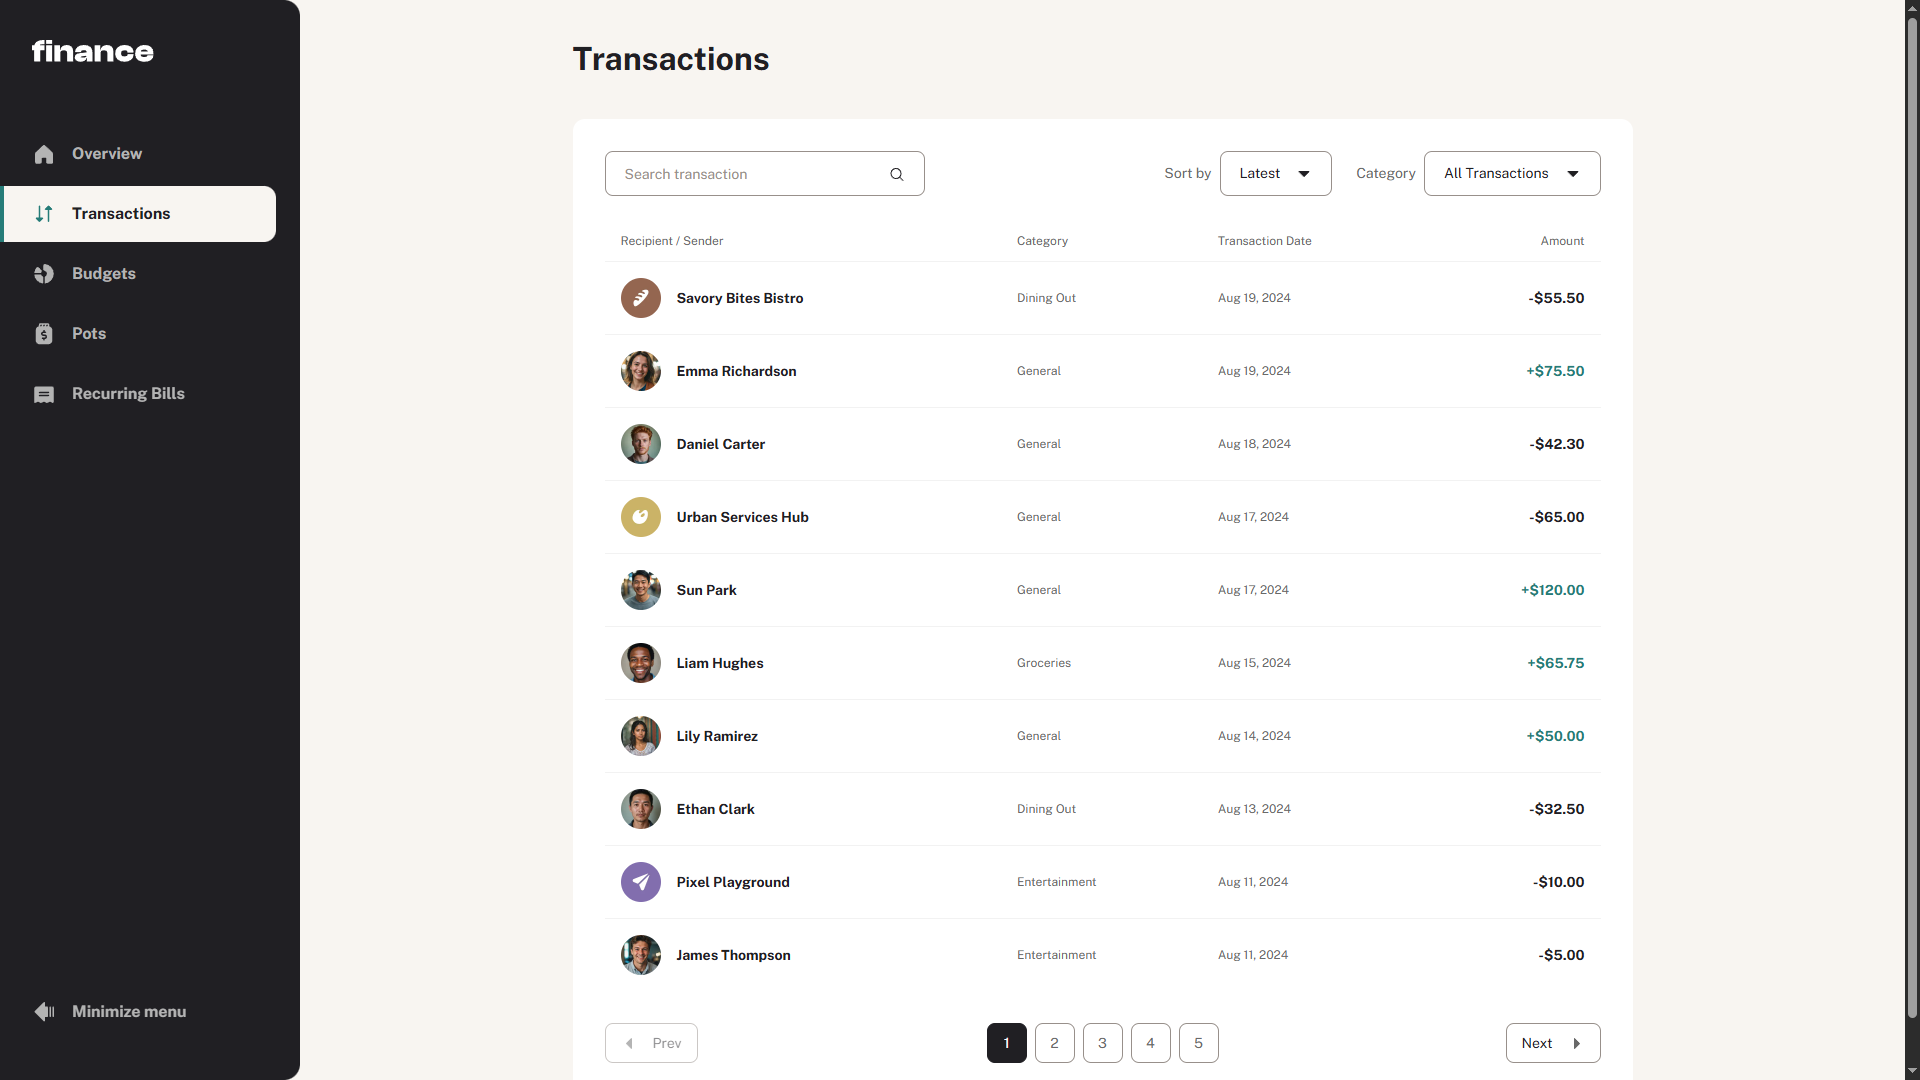
Using the form at the top of the page, the user can search, sort, and filter transactions. From reading the challenge requirements, I knew I wanted to use the URL for this. The budgets page has links to the transactions page with the category filter enabled.
forms let the user submit information to the app. This information is often stored in a database as part of a mutation flow. Here, however, the form lets the user navigate to the same page but with additional parameters.
The browser adds the parameters to the URL when the user submits the form. This is all default behavior. All we have to do is link these “search parameters” to the list of transactions. On the server, we extract the parameters from the URL. Then, we use those values to filter and sort the transactions.
const TransactionsPage = async ({
	searchParams,
}: PageProps<'/transactions'>) => {
	const { name, sort, category, page } = searchSchema
		.extend({
			page: z
				.preprocess(
					(val): unknown => (Array.isArray(val) ? val[0] : val),
					z.coerce.number().int().positive().lte(maxInt)
				)
				.catch(1),
		})
		.parse(await searchParams)

	const { transactions, totalPages } = await getPaginatedTransactions({
		name,
		category,
		sort,
		page,
	})

	// todo: Render `transactions`
	// return <></>
}
Usually, forms include a submit button. The form in the design does not. This makes me think the transactions should update as the user changes the controls. The page should not wait for a form submission. This is possible with JavaScript, but the baseline app requires the user to submit the form.
We could add a button to the baseline version. However, this would cause a layout shift if we were to remove it in the enhanced version.
For this project, I chose to adhere to the design. The user can still submit the form by pressing Enter while focused on a form control. All users might not know that, however. Therefore, I would add a submit button to both versions of the app in a real project.
The updates to the search parameters are navigations. Like any other navigation, Next.js wraps them in Transitions. This shows the stale UI while the app fetches data from the server. To keep the form interactive, we can use optimistic values.
Here, I create a function that updates the optimistic value of the search parameters. Then, the function uses the Next.js router to navigate to a URL containing those parameters:
const setSearchParams = useCallback(
	(searchParams: ReadonlyURLSearchParams) => {
		startTransition(() => {
			setOptimisticSearchParams(searchParams)
			router.replace(`${pathname}?${searchParams}`, {
				scroll: false,
			})
		})
	},
	[pathname, router, setOptimisticSearchParams]
)
Mutations
So far, the app is only navigating the user. For some features, we need the user to provide data. Our baseline version can use forms for this purpose. The enhanced version can use JavaScript to give feedback to the user as they fill in the form.
For the baseline experience, forms are the only way for the server to receive data. This means that for every baseline mutation, we will need:
- A
formthat submits data. - A Server Action that receives FormData from the form.
- A validation schema.
Server Actions are special JavaScript functions that Next.js compiles to server endpoints. They can take any parameters serializable by React. However, we must use FormData since all our mutations need to go through forms.
I use Zod to create validation schemas. The enhanced app uses the schemas to give the user feedback as it fills in the form. The server uses the same schemas to ensure we do not act on invalid data.
The baseline app posts HTML forms to the server. The server responds with a “Redirect” status code. The browser navigates the user to the next page.
The enhanced app uses the forms of React which call the Server Action inside Transitions. This lets us create custom pending states. The Server Actions perform client-side navigations similar to the Link component.
Validation
HTML includes common validation rules. For example, we can set the required attribute on required form controls. The browser will then tell the user about empty fields before making a server request. We cannot style those error messages, however. Using JavaScript, we can provide error messages that adhere to the design of the page.
Wiring up form interactions is tedious work. In this project, I am offloading this state management to Conform. The form library uses validation schemas to display error messages to the user. Conform implements progressive enhancement. For the baseline app, Conform applies HTML attributes for the browser to use. In the enhanced app, Conform adds the styled error messages using JavaScript.
Form controls
Similar to the error messages, we cannot style the options of the select element. To adhere to the design, we have to reimplement the combobox using other elements. Then, we can style those elements instead.
A lot of work goes into reimplementing form controls from scratch. It is important that the behavior of the components follows the ARIA spec. This ensures users of all different devices can use our app. React Aria Components provides components for these use cases. The components implement ARIA attributes, keyboard interactions, and popover positioning. They come unstyled. This allows us to style the components according to our design.
On the budgets page, the app swaps between buttons and links for the menu “buttons”. This provides different experiences between the two versions of our app. We have to work in a similar fashion here. The baseline app makes use of native select elements. When JavaScript becomes available, the app swaps these elements for the JavaScript components.
We do not want to introduce layout shifts during the enhancement. While the comboboxes cannot look exactly the same, we can come close. The size is the most important part. If the sizes are different, the component may push the elements around it.
Minimizing the Menu
The challenge defines a button to minimize the menu in the app:
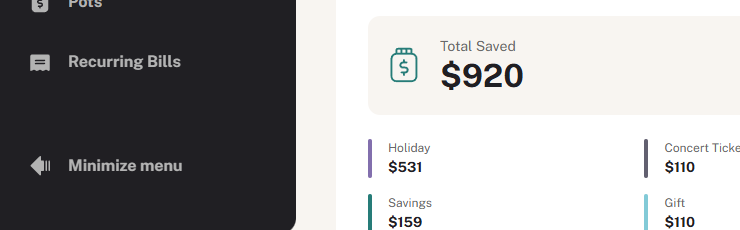
This feature is, in itself, an enhancement of the user experience. It would have been acceptable to hide this button in our baseline version. Then, show the button when JavaScript becomes available.
Nonetheless, I challenged myself to implement the feature in the baseline app as well.
I did not want the menu state to leave traces in the URL. A user clicking on a shared link should not receive the state of the original user’s menu. Instead, I chose to use cookies to store the state of the menu.
The baseline app requires the server to respond with a Set-Cookie header. This tells the browser to update the state inside the cookie. Though we are not making any mutations to the database, we wrap the button inside a form. This triggers a POST request to the server when the user presses the button. Inside that form, we also include a hidden field that specifies whether the user wants to open or close the menu.
The baseline app has to make a round trip to the server to display the new menu. This delay is not necessary in the enhanced experience. The JavaScript app already knows what the menu is going to look like next. Therefore, it can apply an immediate change to the page.
There are multiple ways of implementing this. With JavaScript, we can do all this work in the browser. The app can read the initial state from the cookie. When the user presses the button, the app changes both the JavaScript and the cookie state. This is the correct solution for this use case. However, I wanted to see what this would look like using optimistic values in React.
React wraps Actions provided through an Action prop in a Transition. My first try looked like this:
<form
	action={(formData) => {
		setOptimisticIsOpen(formData.get('value') === 'true')
		void minimizeMenu(formData)
	}}
/>
This stops the baseline version from working. To use progressive enhancement for the form, the value of the Action prop must be a Server Function. Not any async function will do. To use progressive enhancement, we can use a more traditional approach.
Here, we prevent the default behavior of the form when JavaScript is available. Then, we call the action ourselves. This makes the server send the Set-Cookie response. The Transition will last for the duration of this round trip. During the Transition, the app shows the optimistic state of the menu to the user. Since we are no longer using the Action prop, we have to start our own Transition:
<form
	action={minimizeMenu}
	onSubmit={(event) => {
		event.preventDefault()

		const formData = new FormData(e.currentTarget)
		startTransition(() => {
			setOptimisticIsOpen(formData.get('value') === 'true')
			void minimizeMenu(formData)
		})
	}}
/>
The baseline version has to wait for a round trip to the server to toggle the menu. The enhanced version toggles the menu immediately.
Additional Feedback
HTML has answers for all major features of this project. However, for some features, there are no equivalent solutions to the JavaScript pattern.
One such feature is the character counter below the name field of the pot forms:

Another is the button that toggles password visibility:

When managing the money of a pot, a bar visualizes the change:
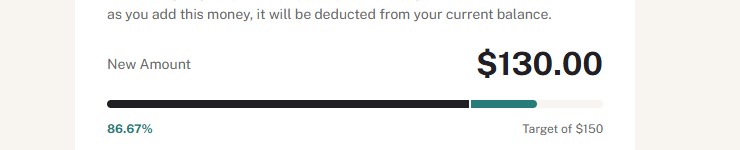
These features do not reflect the main purpose of visiting the site. They are smaller enhancements that we add to an already coherent experience. We allocate space for them in the baseline version to avoid layout shifts as the app enhances.
Adhering to User Preferences
We build a resilient app with progressive enhancement so that more users can use the app. For the same reason, it is important to take into account the users’ browser settings. This lets users browse the app on their terms.
I built the site in a responsive manner. This means users can use the app on many different devices, regardless of their screen size. The app changes the layout of the page depending on the available space.
I used the rem unit for measurements. This lets users choose which size to display the content using the font size setting of the browser. The user can also zoom in on the page without experiencing horizontal overflow.
The site also supports high-contrast mode.
I implemented this by embedding all icons as svg elements. Then, I set the color of the shapes to currentColor. This makes the icon color follow the text color of the element.
The browser also paints all borders in the foreground color by default. Not all shapes in the design had borders, though. Tailwind provides forced-color utility classes. I used those classes to draw borders around cards to preserve their shape.
Not all borders should have the foreground color. Some elements on the budget page use color to link the budget to the graph. I used forced-color-adjust to opt out of adjustments for those elements.
Conclusion
This was an inefficient way to implement progressive enhancement. I picked this challenge because it looked like a good candidate for this workflow. Even then, it was an uphill battle to work from a design file set in stone.
We should consider progressive enhancement when designing the features. Start from the baseline experience and add features to it. This would simplify the code and create better user experiences.
The search form that missed a submit button is one of those features that I would iterate on. I also sunk a lot of time into synchronizing the combo boxes between the experiences. All to enhance the styles of the options.
Once I created the baseline experience, the enhancements felt like a lot of work for little yield.
A red flag to watch out for is when the code has to check whether JavaScript is available. This means we are about to swap experiences rather than layer them.
The dialogs on the budgets page are examples of this. They are not as much an enhancement as they are a replacement. There are now two user flows to consider when maintaining related features.
When the code has to check whether JavaScript is available, it is best to go back to the drawing board. Either simplify the app or give up on progressive enhancement. Simplify the app by working from the baseline experience, not the enhanced experience. Giving up on progressive enhancement can also be a valid alternative. Some features require complex interactions that we cannot replicate with HTML.
I had some prior experience with Next.js. However, I had not used it to this extent. It was interesting to see all the new React features come together in the App Router.
It was, at times, challenging to use Next.js to implement progressive enhancement. It was not always obvious which features required JavaScript to work. This is not documented, and so I had to resort to trial and error. It got easier to filter features as I realized the streaming features used Suspense. Other features were more confusing as to why they did not work in the baseline app. The notFound method is the only way to respond with a 404 status code. However, Next.js cannot show the corresponding error page without JavaScript.
I also had problems using features that should work. I spent a lot of time on canary versions. The Intercepting and Parallel routes in particular had some rough edges. For a while, cookies did not work for the baseline app. At one point, even my console.logs were throwing errors!
The Next.js team has since fixed these bugs in Next.js 16.
This project got me thinking about apps in terms of their broader purpose. What can I remove while still providing the main features?
How far can I simplify the designs? If I am allowed to iterate on a design to optimize for progressive enhancement, what more can I optimize for? Bundle size? A lack of client-side routing?
This would be interesting to explore in similar future projects.