Streaming a Weather App with React Router
15 min read
- Live site
- Weather App
- Code repository
- markuslewin/weather-app
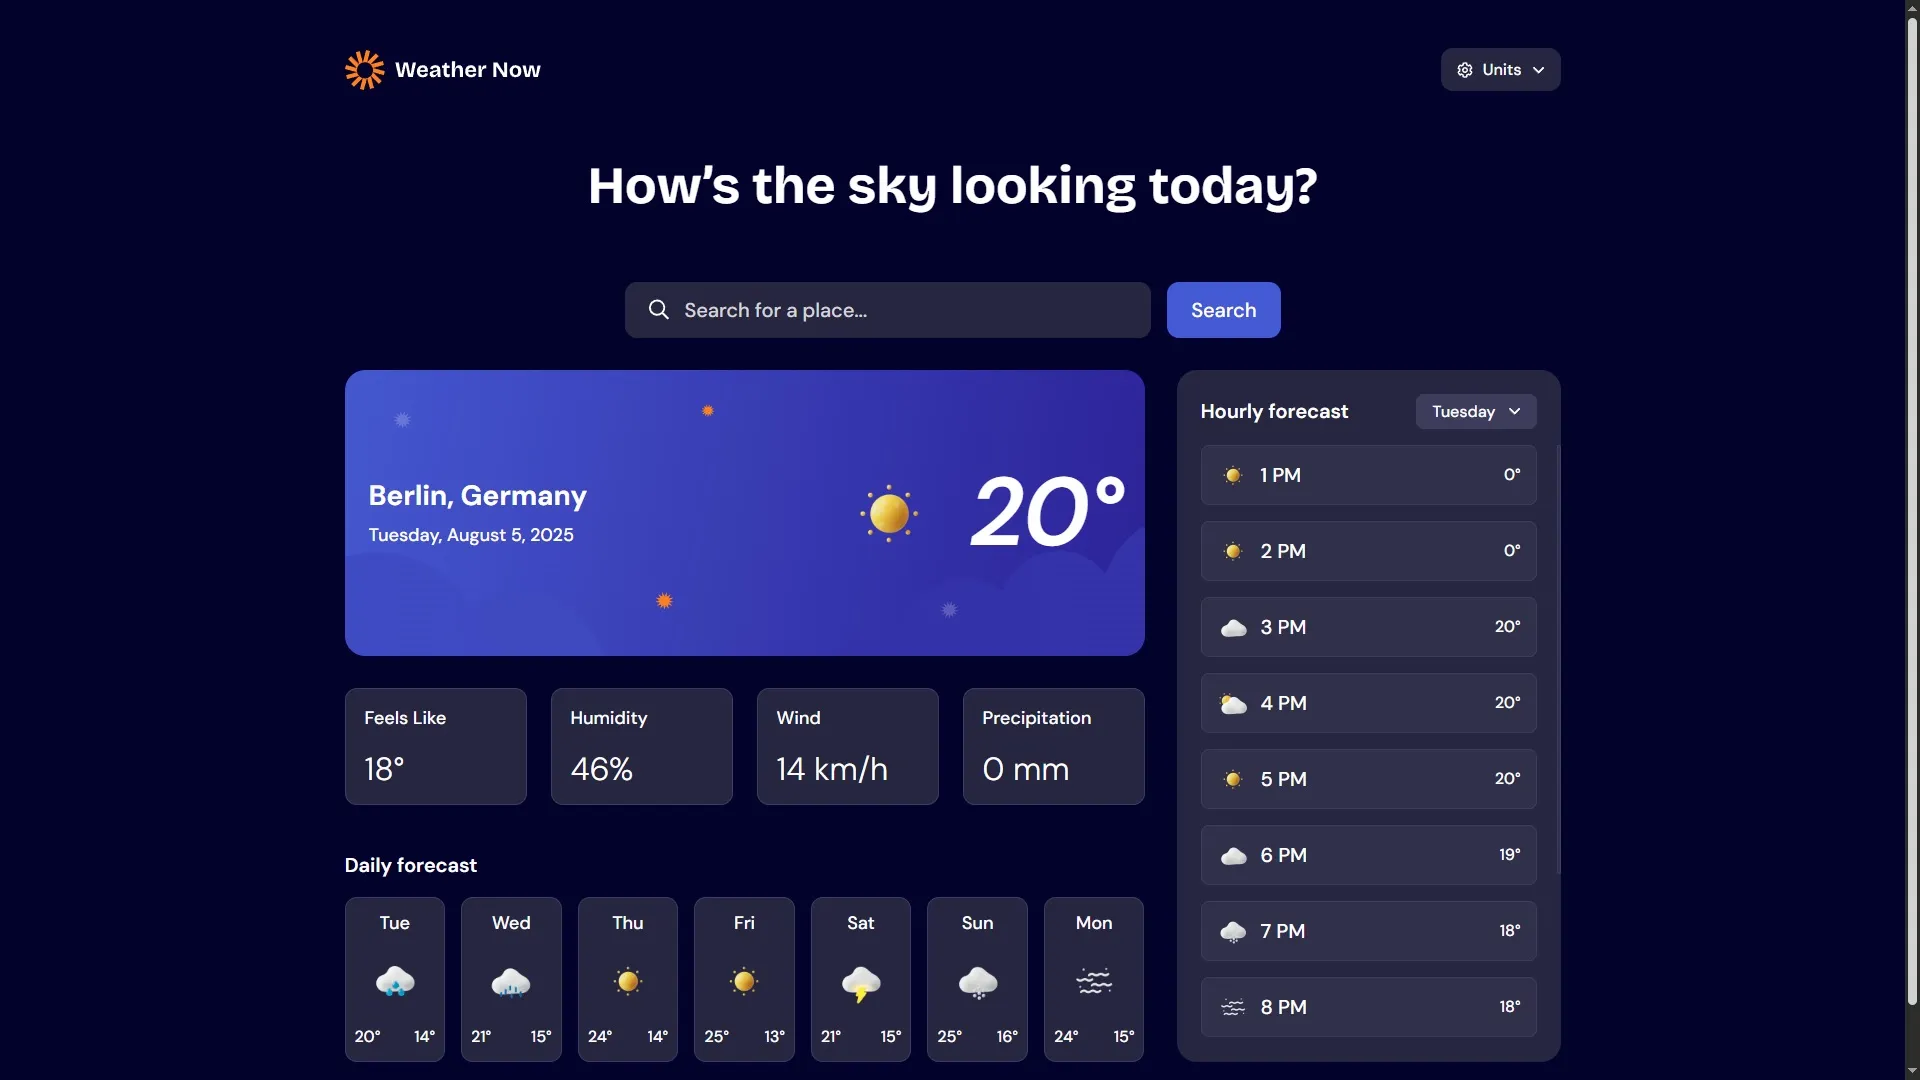
This is a weather app I built recently:
The user can search cities to show the weather for. The user can also choose which units to show data in.
It is responsive and supports high-contrast mode. It also respects the user’s font size and zoom settings.
The idea for this project was to try streaming data. This is one of the core features of modern frameworks. When streaming data, the user receives the layout of the page early. Then, the app fills in the slower data as it becomes available. This can result in a user experience that feels faster.
I like using the challenges at Frontend Mentor to try new technologies. The site provides challenges that mirror real-world projects. Each challenge contains a design file and a list of requirements to complete. This way, I can focus on the technical aspects of the project.
Browsing through the challenges, I came across the “Weather app” challenge. The challenge is to build a weather app using the Open-Meteo weather API. I noticed the design included skeletons for the weather data. I knew this would play well with streamed data.
Streaming HTML
It is important to understand the network calls involved in delivering the app to a user. We can buy faster servers, but we cannot buy faster networks for our users. We want to make as few network requests as possible. We also want to parallelize the requests we do make.
An approach all too common is to fetch data from inside a React component. This puts the data fetch behind many blocking network requests. First, the browser has to fetch the HTML. Then, the browser has to fetch the JavaScript. Then, it has to parse and run that JavaScript. Now, the browser can finally start fetching the data. If the data references an image, the app requires yet another round trip to a server.
Fetching data on the server reduces the number of blocking network calls. React Router has “loaders” that load data server-side. Now, the app can fetch data as soon as the request reaches the server.
export const loader = async () => {
	// Wait for all data
	const [slowData, fastData] = await Promise.all([getSlowData(), getFastData()])

	return {
		slowData,
		fastData,
	}
}
This is a huge improvement over fetching the data from the browser, but we can do even better.
So far, our app adheres to the usual request-response cycle. The drawback of this model is that the server must wait for all data before responding to the client. The speed at which the server can respond is bound to the slowest data fetch.
HTTP streaming lets a server send responses in chunks. The server can now send the layout of the page immediately. Then, the server can stream data to the browser as the data becomes available.
This can result in a better user experience. The user can interact with fast data earlier. The feedback makes the page appear to load faster.
To opt in to streaming in React Router, we can return Promises from our loaders.
Features
Streaming data means approaching the project server-first. For the server to send data in chunks, it must know what data to fetch. The context used for data fetches differs between runtimes. The browser has the complete state of the app. The server only has the request object. The main part of the request object is the URL.
There were some challenges related to the app’s logic. However, most of the work went into structuring the app around the URL. This lets the server render the views early.
The Initial Load
The design file contained skeleton placeholders to show while the data was loading.
At first, I thought about having the user provide the city name through the URL. To show data for Berlin, the user could browse to /berlin. This did not work out. It turns out there are a lot of cities named Berlin in the world!
The weather API requires the coordinates to load data for a location. I settled on forwarding these parameters to the user via search parameters: /?lat=52.52437&lon=13.41053. This creates an unambiguous identifier to fetch data for.
Using the URL to provide information for the server also creates features for the user. One of the optional features for the challenge is the ability to save locations. By storing the coordinates in the URL, the user can use the bookmark feature of the browser instead. The user can also share URLs. This is the current weather in Stockholm!
Here is a simplified version of the final data loader:
export async function loader({ request }: LoaderFunctionArgs) {
	// Parse the search params
	const searchParamsResult = homeSearchParamsSchema.safeParse(
		Object.fromEntries(new URL(request.url).searchParams)
	)
	// If we don't recognize the search params, we default to the initial view
	if (!searchParamsResult.success) {
		return { type: 'initial' } as const
	}

	const searchParams = searchParamsResult.data
	// Get the weather data, but don't wait for the async function to complete
	const weather = getWeather({
		latitude: searchParams.lat,
		longitude: searchParams.lon,
	}).catch((err) => {
		// Log the error server-side
		console.error('[Streamed error]', err)
		throw err
	})
	// Stream down the weather data by returning it as a Promise
	return { type: 'location', data: { weather } } as const
}
And of the part of the app that reads the weather Promise:
<Suspense fallback={<DaysSkeleton />}>
	<Await resolve={weather}>
		{(weather) => {
			return weather.daily.map((day) => {
				return <Day key={day.time} data={day} />
			})
		}}
	</Await>
</Suspense>
Searching Cities
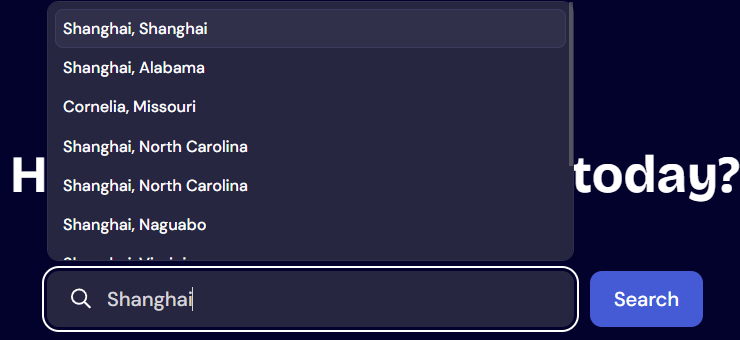
I struggled with the innocent-looking search form. What is the intended behavior here?
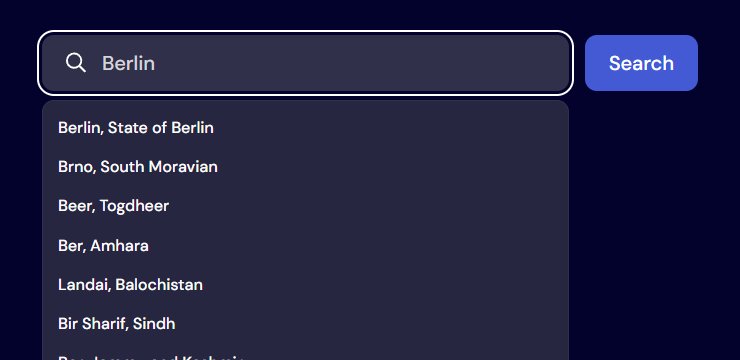
At first glance, it looks like every other search form on websites. As the user starts typing their query, a list of suggestions loads in. If the user selects one of the suggestions, the app navigates to that page. If the user presses the search button instead, the app navigates to the search results for the query.
The design file does not include a page for the search results, however.
I considered some other approaches. Maybe the search button should open the list of suggestions? I could also remove the search button and let the user navigate only through the suggestions.
In the end, I chose to let the search button navigate the user to the first match of their search. This is not a perfect solution. Searching for “Berlin” will always navigate the user to “Berlin, Germany”. To navigate to “Berlin, Maryland”, the user will have to use the list of suggestions. The solution does adhere to the visual design, though. This also meant I did not have to create a new page for the search results myself.
In hindsight, I should have caved and built a new page myself. It seems like the only correct solution. I thought I could save time by avoiding it. However, I went back and forth on different “hacks” so many times that I ended up wasting time instead.
The Location Name
Showing the name of the location also turned out to be a challenge, surprisingly enough.

It turns out the weather API only returns the name of the location from the search endpoint. It does not return the city name from the weather endpoint.
This is not a problem if I only fetch data through the suggestion list. When the user presses a suggestion, I store the city name in a variable. Then, I fetch the weather data for the next location.
This project fetches data based on the URL, though. This lets the server fetch and stream data. A consequence of this is that users can navigate to a location via the URL—not only via the suggestions. This means I have to fetch the city name from the data provided by the URL.
To solve this, I perform a reverse geocoding lookup on the coordinates used to fetch the weather data. The server sends the coordinates to the reverse geocoding API of Azure Maps. The API responds with a street address.
To use the Azure Maps API, I had to provision an “Azure Maps Account” in Azure. I am hosting the web app on Netlify, outside of Azure. I connect the web app to the maps account through an app registration with a client secret.
This was easier than I expected. I finally have a solid understanding of service principals and permissions in Azure.
The Settings
The app also lets the user decide in which units to display the weather data.
Once again, this is information the server needs to know to render the app. I chose not to include the settings in the URL. When the user clicks on a shared link, the app should adhere to the visitor’s settings. It should not adhere to the settings of the user who shared the link.
Usually, the server can retrieve user settings from a database. However, there is no authentication in this app. If we cannot use the URL or a database, we will have to go with cookies:
export function loader({ request }: LoaderFunctionArgs) {
// Read settings from the cookie header server-side
const settings = getSettings(request)
return { settings }
}
export default function Layout({ loaderData }: Route.ComponentProps) {
// Use parsed cookie data as initial settings
const [settings, _setSettings] = useState<Settings>(loaderData.settings)
const setSettings = (settings: Settings) => {
// Every time client-side settings change, also update the settings cookie
document.cookie = `${settingsCookieName}=${serializeSettings(settings)}`
_setSettings(settings)
}
// ...
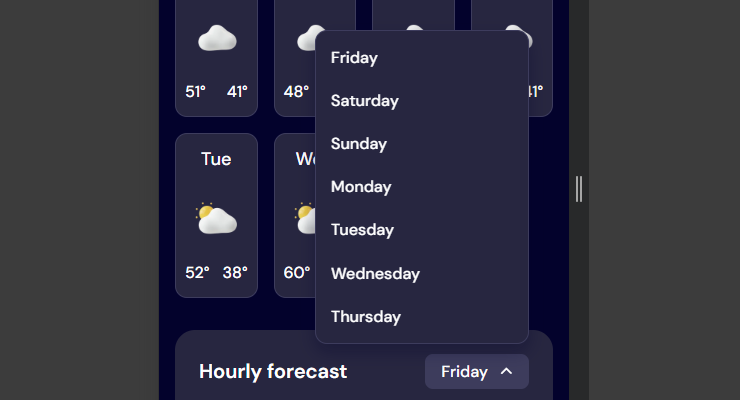
}The Hourly Forecast Filter
Lately, I have been thinking about async UI and affordances. In this project, the UI is showing placeholders while the data is loading for the first time. The app holds the UI in the past when the user navigates to a new location. The UI tears when showing suggestions for the search field.
Sometimes, the app can avoid doing any complex async work at all. For the hourly forecast feature, I “over-fetch” data. The server fetches hourly data for the whole week, even though only today’s data is necessary at first. This avoids further round trips to the server when the user selects another day.
The drawback of this solution is that fresh data is not fetched when the user selects another day. This is okay; it will still remain consistent with the rest of the UI.
The Popovers
I could have implemented popovers better in this project. They do adhere to the design file, but I could have made them use the space better for smaller viewports.
I used React Aria Components to create accessible components customized for the design. The library is doing heroic work handling the collisions for the popover. However, I dislike having the popover appear over the element with which I am interacting.
A better approach would have used the space in a more efficient manner. The autocomplete could have been a “pop-out” experience on mobile devices. When the user typed into the field, the field could have floated to the top of the viewport. This would have allocated space for the suggestions to appear below the field. The comboboxes could have imitated the native behavior of the select element. The menu of options could have covered the whole viewport.
I could have caught these inefficiencies before writing any code. I will watch out for this in future projects.
Time Zones and Daylight Saving Time
I worked on booking systems early in my career. This makes me interested in seeing how the services I use handle daylight saving time (DST). Not all days are 24 hours long, as we change the clock between summer and winter time. What data can I expect from the weather API when this happens?
The answer for this weather API is that it does not take DST into consideration in the responses. Consequently, the UI—by default—displays incorrect hours and days during a DST change. To fix this, I decided to process the times further using the date-fns library.
For the hourly forecast, the API simply increments the hour by 1. It ignores the offset change that occurs during a DST change. This makes the times reference the correct moment but have the incorrect “name”:
| UTC | Europe/Stockholm | API | Note |
|---|---|---|---|
| T00:00Z | T01:00+01:00 | T01:00+01:00 | |
| T01:00Z | T03:00+02:00 | T02:00+01:00 | The API references the correct UTC time, but is incorrect. The wall time does not exist in the local time zone. |
| T02:00Z | T04:00+02:00 | T03:00+01:00 | The wall time continues to be off. |
All I had to do to fix this was tell the API to return UNIX timestamps instead of preformatted strings!
Fixing the times of the daily forecasts is trickier. The author of the API proposes a solution that recreates the API-side issue on the client. This gives me the correct day but references the incorrect moment. By sending this information off together with the time zone to date-fns, I get the correct moment:
// This recreates the API bug. This and gives us the correct wall time, but with the incorrect offset (UTC +0)
const utcWallTime = fromUnixTime(time + data.utc_offset_seconds)
// Set the correct offset
const localTime = new TZDate(
	utcWallTime.getUTCFullYear(),
	utcWallTime.getUTCMonth(),
	utcWallTime.getUTCDate(),
	data.timezone
)
Automated Testing
I used Vitest and Playwright to ensure my app works as expected.
In the past, I have postponed setting up the testing frameworks until I felt I needed them. This time, I tried setting them up from the start of the project. This made it easier to start writing a test when I felt I needed one. This led to a more complete test suite at the end of the project.
Writing unit tests using Vitest was easy enough. Import the function, call it, and assert the result. Testing the app end-to-end turned out to be more difficult…
React Router compiles my one app into both server and client bundles. This makes the app dependent on several environments at the same time. Unit testing frameworks have yet to catch up to this paradigm. The recommended way to test route-level components is to use E2E testing frameworks.
What makes this challenging is that the app and the tests exist in different processes. For some projects, this is not a huge problem. The test writes data to a database, and the app reads data from that database. The processes communicate through the database. In this project, there is no database. The server fetches the weather data from an external API.
To solve this, I used MSW to intercept network requests from the server. Then, I made the interceptor try to find data files written to the filesystem. If the interceptor finds a file, it responds with the data from that file. Otherwise, it returns some default data. The tests can now write data files to control the responses for the API. The processes communicate through the filesystem.
I created Playwright fixtures to make this easier to work with:
test('shows error view when forecast fails', async ({
	page,
	setMeteoForecastSettings,
}) => {
	// Write a JSON file to filesystem
	await setMeteoForecastSettings(null, { status: 500 })
	// Navigate to the app
	await page.goto(createHomeUrl({ lat: '0', lon: '0' }))

	// Assert the app reacts correctly to a "500 Internal Server Error" response from the API
	await expect(page.getByRole('heading', { level: 1 })).toHaveAccessibleName(
		/something went wrong/i
	)
})
The request handlers of MSW encapsulate logic related to the filesystem. I remove MSW and its request handlers when I build the app for production. The production app does not try to read data from the filesystem.
The E2E tests give me a lot of confidence that the app will work in production. I am not mocking services; I am mocking data at the edges of the app. The bundle I am testing is the bundle that I will release to production.
Conclusion
Streaming unlocks performance improvements beyond the common request-response cycle. React Router makes it easy to opt into the feature. I return the Promise of the data fetch, and read that Promise inside a Suspense boundary.
The Suspense boundary requires JavaScript to replace the fallback for the data. This means we cannot use progressive enhancement for the project. This makes it a non-starter for some apps. I would look into streaming for any app that already requires JavaScript.
The design I implemented contained loading states for the initial page load. It is important to be intentional about loading states. If UI elements begin popping up at random, the user may prefer to stare at a blank screen. A simple skeleton can go a long way here.
Modeling the app around the URL does require some effort. In this project, I had to set up a reverse geocoding service to tie the app together. It is best to consider the URL from the start of the project to avoid costly refactors.
I built most of the features around the router of React Router. This meant I had to find ways to author E2E tests to test the app. This is fine for an app of this size. For larger apps, E2E tests can get costly. In future projects, I should structure the code in a way that offloads work to integration tests.